Showing posts with label crafts. Show all posts

Friday, April 10, 2015

Fairy Wand Suncatcher

Sometimes when I lay awake in bed at night, I think of various projects that I want to try. Well last night, I kept thinking about this particular craft, and I decided to give it a try. Not only was it a success, it turned out even more lovely than I expected. 
I've dubbed this project the Fairy Wand Suncatcher, and when you see the finished project, you'll understand why. Now, I'm going to give you the step by step on this, but since it's made using assorted odds and ends from my yard and craft box, I doubt any two would ever end up looking the same. But at least you'll get an idea. 
Here is the completed project. Not the best photo, but all I have is my phone, so it's the best I could do. 


To begin with, I went outside, behind my apartment, and found a couple of decent sized branches. There were plenty on the ground, so I didn't have to mutilate a tree for this. I looked for ones that had enough bulk to hold some weight without breaking, without being too big. I also paid attention to the shape, because I wanted my stick to have some character. 
Once you've selected some that you like, bring them inside and give them a quick cleaning. Check for bugs, loose bark, anything that might ruin the look. 
After deciding which one would work best for this project, I mixed together some white craft paint with water and quickly brushed on a whitewashing coat. Depending on the look you're going for, you could leave your branch natural, or paint it any number of colors. I wanted a birch type color for mine, so a light whitewashing did the trick perfectly. 

Whitewashed branch next to a natural branch. 

After the paint dried, I decided I wanted to give it a bit more pizzazz, so that it was extra eye catching and shimmery when displayed in the window. To do that, I gave the entire branch a good coating of spray adhesive (an all purpose glue would work as well) and then shook on some iridescent glitter. Not too much, just enough to give it a magical sparkle. To help keep the glitter from falling off, and to add some protection, I also gave my branch a good cover of clear coat spray. 


After allowing plenty of time for the clear coat to dry, I had to decide what I wanted to hang from my shimmery stick. After digging through my various craft odds and ends, I decided on some handblown glass leaves that I had rescued years before from a broken windchime. 

I've been in love with these beauties from the first moment I saw them, and this was the absolute perfect project for them. But if you don't have glass leaves, you can always string beads, crystals, flowers, or anything else you may have around your house. Or use a combination of items. This project is all about being creative and using what you have. 
I used some shimmery ribbon that I had leftover from a previous project to tie the leaves on, and I staggered their lengths to give it a pretty effect.
I finished it off by hot gluing a few small silk flowers onto the branch, and adding the string to hang it with. (I tied the string to each end, to allow it to hang more evenly.) A few suction cups stuck to the window, and viola! A beautiful Fairy Wand Suncatcher! 

Again, not the best photo, but you get the idea. This would also be a great project for a patio wall, or hung in a garden. I'll definitely be making more of these. I just love it! 

Needed for this project:
*large stick or small branch
*white paint
*spray adhesive or all purpose glue
*glitter
*clear coat spray (optional)
*ribbon or string
*assortment of items to hang
*a few small silk flowers (optional)

Monday, July 21, 2014

Storybook Baby Shower

My beautiful sister in law is having her first baby in a few short months. To honor her, and this blessing, her mother and I threw her a baby shower. I LOVE party planning. It combines all the things I enjoy most. Creativity, organization, decorating, crafts, and more.
For this shower, we decided on a storybook theme. As a huge bookworm, I couldn't help but be delighted by this choice. But it also allowed for a more mature and sophisticated party, which is what the mom-to-be was looking for.
We decided on a color backdrop of yellow and white, which is bright, happy, and perfect for a mid summer shower.
Once the theme and colors were chosen, it was just a matter of putting the rest of the details together. The grandma-to-be found a gorgeous banquet room at a restaurant, so that covered the food and location, which was great, since it allowed us to focus on the little details and special touches.
We began with the invitations. Since the theme was storybook, we wanted to incorporate that into every part of the shower, especially the invitations. So I designed and handcrafted special "books".


Each page was rhyming, and included all the pertinent information. Where, when, etc. So it read like a miniature story. And in lieu of using the standard registry cards, I opted to make "bookmarks" instead, further adding to the fun theme.


Then once they were all made and ready, I sealed the envelope up with a stamp. (And the story begins)
The invitations were a hit, and it really set the party theme off right. Definitely a bit more time and effort involved in hand making invitations, but if you can do it, I strongly suggest it. The special touch it adds is worth it.
Once we had the invitations mailed off, I set to work on the rest of the event. I began by choosing games. The guest of honor was not a big fan of traditional baby games, and requested something simple and low key. Sticking to the book theme, I created two games. The first was a word scramble, using the names of characters from popular children's books, and the second was a quiz, testing the guests knowledge of children's stories.
With games come prizes, and we all love a good prize. I chose one fun prize, and one practical prize, since we had a varied age range of guests. The fun prizes were candle warmers, with 2 packs of scented wax melts, and a package of tealights.


I wrapped them all up in clear cello bags, and tied it up with a tag that was made to look like a popular children's book. Inside each book tag was a message.
For the more practical prizes, I chose an oven mitt, tucked 3 kitchen utensils inside of it (slotted spoon, spatula, and spoon) and added a package of scrubby dish cloths. Again, I tied these up and added a book tag as well.


Since we also had a diaper & wipe raffle, we needed a couple nice prizes for the lucky winners of that. For that, we opted for some pampering shower goodies. Body wash, scrub, sponges, facial masks, etc.

Instead of the book tags for these, I decided on a little word play I had seen on Pinterest, and made tags that said "From our shower to yours..." which I thought was adorable.
And because we didn't want anyone to leave empty handed, for everyone who didn't win a prize, we had beautiful bookmarks as a consolation prize.


One of my favorite parts of planning and hosting a party is the decorating. I love finding creative ways to incorporate a theme into even the smallest of details. This shower was no exception. The main focal point for the decorations was a long table at the entrance to the room. I used this space to bring in some special and meaningful touches for the mom-to-be. I created a clothesline of sorts, and hung up both of the outfits the mom & dad to be came home from the hospital in, and one special outfit for the new baby. I also had photo copies of nursery rhymes from old books, and hung them on the line as well. Below that were special photos and some old toys, all displayed alongside childhood favorite books from both of the parents to be.


Not only was this space a great conversation starter, but it made a beautiful backdrop for special photos of the mom to be and her guests.
The next big décor choice was the table centerpieces. For this, we really tied in to the book theme. I wanted and needed several books to pull this off, and I have to say that my friends really came through for me here. I put in a request for some books, and received more than I expected. So thank you to everyone who donated their old books. (All books used as decorations were sent home with the mom to be to start a wonderful library for the baby.)
For the centerpieces, we started with yellow and white gingham fabric, cut with pinking shears into large squares. On that, we stacked several books, topped that with a mason jar of simple flowers, with lemon slices in the water, and added a framed quote about reading or books. The finished product looked like this.

Simple, elegant, and perfect. Each table had a different quote, and a different stack of books. I couldn't be happier with how these turned out.
With a few balloons for color, and a few small touches here and there, that was about it for the decorations.
We also had the most delicious and adorable cupcakes that the mom to be ordered from a friend. They were individually wrapped so that each guest could take it home if they wanted. Each one was tied off with a book tag, with a special message from the guest of honor inside. The cupcakes were so cute, we gave them their own table to display them on.

It's hard to see them in this photo, but they were beautifully done and DELICIOUS! And for those of you wondering, yes, that is Hank the Gnome peeking out from beside the flowers. He dressed up for the occasion and made a special appearance.
I also handmade pin/corsages for the Mom-to-be and the two grandmas to wear for the party.


All in all, I think it was a success. The food was amazing, the guests were wonderful and generous, and the Mommy to be was smiling the entire time. I think this baby boy is going to be spoiled rotten with love, and I'm so happy to have been a part of this special day.


Friday, October 4, 2013

I Swear, I Do Still Craft

Yes, I have been slacking on the crafting posts lately, and for that I apologize. But I swear, I am still making things. So here are a few of the more recent projects that have come out of Berry Favorite Things. As always, to see more of my crafts, and get helpful tips and more, follow me on facebook.
                       (Just click here, and let it take you there)


I am a BIG fan of the 'I Love You Because' boards. And especially this dry erase version. This one was made as a gift for a sweet young man to give to his girlfriend. If you haven't guessed, she loves purple.


This is a custom made shelf/coat hook that my husband and I created together. This one was done in an antiqued ivory style, per request, and I think combined with the glass knobs, it is a stunning piece.
 
 
This is a vintage inspired magnetic board for a young woman's bedroom. The soft grey, purple and ivory are a gorgeous combination, and the jeweled floral attachment adds the perfect finish.
 
 
This is a simple, yet elegant cork board, custom designed to match the buyer's kitchen. The sage green looks very classy against the white, and the deep chocolate brown trim adds a nice pop.
 
 
This beautiful cork board was inspired by the customer's area rug, and makes the perfect addition to their dining room. I love the blue and brown against the clean white board. Very stylish.
 
 
Lately, I have become obsessed with fun brooches and pins. Especially vintage ones. And I always enjoy a project that I can redo, and make even more fabulous. This retro brooch had lost some of its luster, so with a little paint and glitter, and a lot of patience, I gave it new life. Every time I wear this piece, I receive endless compliments. It is definitely one of my favorites.
 
 
As I mentioned above, I love to take something old (or destined for the dump) and make it useful and beautiful again. This wall décor was something my mother-in-law had owned for years, and had seen better days. But rather than throw it out, I gave it a new look, and a new purpose. It is now the towel/robe hanger in their master bath.
 
Well... I realize it isn't much, but at least you now know I haven't completely given up on my crafting. And don't worry... winter is right around the corner, so I will have plenty of time to catch up. Stay crafty, my friends.

Tuesday, April 30, 2013

Salt Dough Art Project

For anyone who ever went to camp or took an art class, you are probably familiar with salt dough. The safe for kids, non toxic, cheap and easy to make clay that, though technically edible, still didn't taste as good as Play-Doh. 
Anywho... Salt dough is a great medium for making all kinds of fun projects. It is lightweight, and once dry, can be saved for years to come. After spending an undisclosed amount of time on Pinterest the other day, and seeing endless salt dough crafts, I decided to whip some up and see what I could make. 
Here is the recipe:
1 cup flour
1/2 cup salt
1/2 cup warm water
That's it. Easy peasy. 
Then, you just knead it together until it is well blended (I recommend a floured surface for working with it.) and is a workable consistency. Then get creative. 
You can roll it out and use cookie cutters to make shapes, or just mold it with your hands. You can also use stamps or various objects from around your house to create patterns in the dough.  The possibilities are truly endless. This is also a great kids project. A little messy, but loads of fun. Remember: If you are making something you're going to hang (ornaments, etc.) be sure to make the hole before baking. It is MUCH easier. 
Once you are finished making your shapes/creations, you can set them aside to dry. This can take up to several days. Or you can bake them at a low temp (around 200 degrees) until dry. This can take anywhere from 45 minutes to several hours, depending on the thickness of the projects. I baked mine for about an hour, then set near a window to dry the rest of the way. (They were dry the following afternoon.) 
Once they are dry, you can choose to paint and decorate them, or leave them just as they are. I used craft paint, but any kind of paint will do. I also sprayed mine with a clear coat to finish them off, but again, this is completely up to you. The clear coat will help protect them from dust, skin oils and more, so if it is something you plan on displaying, you should really consider it. Also, it adds a shiny finish, which gives your project a beautiful look. 
All in all, I think this was a fun and successful venture. I plan to make lots more goodies in the future. Happy Crafting! 
My completed first project. I still haven't decided exactly what I want to do with these cuties yet, but I am leaning towards magnets. :)

Monday, March 25, 2013

March's Projects

I figured it was time for my monthly project update. These are all orders I have done recently. Any of these products can be ordered from me via my facebook page.( Click here ) I specialize in custom orders, made to your color/style preferences. 


This is a cork board done in a chili pepper design. Very fun and colorful.


 These are the custom made thumb tacks to match the chili pepper cork board. 


This was a custom made dry erase board I gave away as a prize for a contest. Love the colors in this piece. 


An antiqued shelf with coat hooks made for a customer's mudroom. Can be done in a wide variety of colors as well. 


This was a repurposed/reworked piece. It was repainted in an antiqued blue finish to match the customer's new decor and knobs were added for hanging bathrobes. A fun new use for an old piece. Don't throw away your old stuff, remake it!


This was ordered as a Valentine gift for a customer's wife. A custom Love Notes Dry Erase Board. A great way to show and share your love for one another. 


This custom fairy door was made for a couple of little boys to use as a tooth fairy door. (Remote is shown for size comparison.)


Latest addition to the Functional Wall Art collection. The Mad Hatter. This was a gift for a friend's Wonderland themed nursery. The knobs are great for hanging clothing, towels, etc. Functional Wall Art can be made to match any room. 

Friday, February 8, 2013

Newest Project

I love getting requests for new and fun projects. This one was from a friend of mine, Brenda, who saw it on a website and wanted to know if I could make something similar for her. I figured I'd give it a shot. And thanks to the amazing skills of my hubs, it turned out pretty well.


Tada! She requested an antiqued look in ivory, so that's what I did. The one from the site she had seen was made using scrap pieces of wood, which I did not have. But since I use old cabinet doors for a lot of my projects, I did have one of those that worked as the base. All in all, I think it turned out very well, especially for a first time. So well, in fact, that I already have orders for more. 


This is just another shot I took as an example. But I think this will make a lovely addition to my collections and I look forward to making many more. 

Thursday, January 31, 2013

Various Other Projects (made recently)

If you haven't noticed yet, I make quite a few different things. I will attempt any craft once. And I am always getting requests for new things, so my projects span a wide range. Here are a few of my latest creations.


This is a tooth fairy door that I made for my nephews. I have 2 fairy doors in my home and they never cease to bring me a smile. I liked the idea of having one just for the tooth fairy though. You can leave your tooth on the little front step and in the morning, she has replaced it with a treat. I made this one bright colors since it was for 2 young boys, but they can be made in any color combo, and used in your home or garden for a touch of whimsy.


These are Beerings. They are the most popular item in my Redneck Chic line. I make them in a huge variety of styles. So much fun to wear and quite the conversation starter.


This guy was made as a Christmas gift for a lady who loves frogs. I've made him before in different colors, and he is just so fun. The glass knobs for hanging towels and such were a slightly different touch and a nice pop of color. 


This is another item from my Functional Wall Art line. It was made for a Wonderland themed nursery. I love all things Alice, so this one was a blast for me to make. 


More functional wall art. This pretty little owl is so sweet, I almost couldn't part with her. But I know she will get lots of love in her new home with a very lovely little lady. 


This I made just for me. I love wreaths & they are so quick and easy to make, so I am always making new ones to liven up my front door. This fun one was made using an old garden stake that my Mother-in-Law found. I repainted it and cut the stake off and it was perfect for a wreath! I have a minor (and well controlled) gnome addiction, so needless to say, I wasn't parting with this fella. 
I love to play with paint, but I am far from an artist. But when a friend of mine's birthday rolled around, I knew I had to make him something special. He is a huge Taylor Swift fan, so I made these using lyrics from some of his favorite songs. I want to make a million of these for myself now. A great way to display quotes, songs and more. 


I was recently asked to paint a wooden sign for a customer, and I was excited to try something new, since I had no experience in that. She was so happy with hers, that I wanted to make more of them. This one was for a family member's up north home. It's hard to tell in the pic, but the wood is white washed and antiqued. I look forward to making more of this. Wood is a wonderful medium to work with.


I have an odd sense of humor, so when I saw these pirate themed wood cut-outs on clearance, I knew I had to use them somehow. I have always found the phrase "poop deck" highly amusing, and thought it would be hilarious in a bathroom. So this little sign has a single hook to hang a towel or whatever you'd like. I'm still waiting for the right person for this though. 

Custom Dry Erase Boards (made recently)

I love organization of any kind. Seriously, I have some issues. So cork boards, dry erase boards and more are wonderful. But they are also so very ugly. I mean, who wants to hang a plain white board in a room they've tried so hard to make look beautiful? Not this gal. So I went about creating items that are not only functional, but lovely to look at as well. Yesterday, I showed you some of my latest cork and magnet boards. Today I want to share some of the fun custom dry erase boards I've been making. Remember, anything you see on here is available to order. You can either email me at teenah913@gmail.com or you can follow my facebook page and message me via there. https://www.facebook.com/pages/Berry-Favorite-Things/168231363272448


These 2 were made per request as gifts. They are so fun and would look great in a bar or man cave.

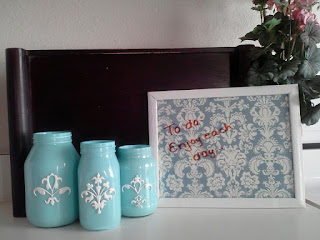
This french country themed dry erase board was made to match one of my regular customer's kitchens. She also ordered the decorative glass jars to match. I love these colors together.

This giant dry erase board was made for an office wall. It is MUCH bigger than my usual sizes, but it turned out beautiful and was a perfect match. I hope it gets plenty of use.


These 2 are part of a new Valentine's selection of gifts. They are the Love Notes dry erase board. A great place to share little confessions of love with that special someone. Can be made in any colors.

This dry erase board/desk organizer combo was created as a request for a unique and functional teacher's gift. It can be made in a wide variety of styles and colors, and would be great for an office or desk as well.